Sunday, December 29, 2013

Penny Black Christmas Friends Christmas card


Hi blogging friends From Millan.Net

Today I am sharing my final Christmas card for 2013 which was one that I made for my wonderful husband.   I am very fortunate that my husband doesn't mind cute and adorable images on his cards so that gives me a plethora of images to choose from!


The image is from the Penny Black clear set:  Christmas Friends, and was stamped using Ranger Archival Jet Black ink and coloured using a mix of Tombow pens and watercolour pencils.  I actually messed up the colouring on the hedgehog's scarf so I re-stamped the image onto the same designer paper I used on the side panel and fussy-cut the scarf and glued it over the messed-up scarf.  I often forget about paper-piecing my images so it was a good reminder to myself to do it a little more often!  I added some grey shading using a Tombow Pen to give the scarf a little bit of 'life'.

I chalked around the image with blue chalk for the sky and brown/grey chalk for the ground.

I added some Kindyglitz Crystalina glitter glue to the mistletoe that the robin is holding as well as the centres on the tiny snowflakes on the sentiment (not that you can see it in the photo!).  I also added red rhinestones to each side of the sentiment circle.

The green cardstock layers were trimmed to 1/16" using my Perfect Layers Tools; the red cardstock layers were trimmed to 1/8".

Thanks for stopping by!

Jocelyn


Card Recipe:

Stamps:  Penny Black Christmas Friends clear set PB-30-084, Lili of the Valley (UK) Christmas Circular Sentiments Set 5 # SET005

Ink:  Ranger Archival Jet Black

Designer paper:  Kaisercraft Santa's List (2013)

Accessories:  140lb watercolour paper, Big Shot, Lifestyle Nesting Circle + Nesting Scallop Circle dies, Kaszazz 43mm circle punch, Perfect Layers Tools, Tombow Pens, Faber-Castell + Albrecht Durer watercolour pencils, paintbrush, Doodlebug Ladybug twine, Fray Stop, red rhinestones (from stash), Kindyglitz Crystalina glitter glue,  Kaisercraft chalks, cardstock - red, green

Punches:  Fiskars Scallop border

Friday, December 27, 2013

LOTV James Little Star Teddy Christmas card


Hi blogging friends From Millan.Net

Today I am sharing the Christmas card that I gave to my daughter.  On the 23rd December, I had the image coloured but my mind went blank when I was trying to think of a layout for it!  It all finally came together on Christmas Eve and I finished it at 3pm - whew!   I am also sharing the beautiful Christmas card and tag that my daughter gave to me which you will find towards the end of my post.


The main image is by Lili of the Valley - James - Little Star - and was stamped onto watercolour paper using Ranger Archival Jet Black ink and coloured with Tombow pens and watercolour pencils.  I adore the LOTV teddy bears - they are so cute!!   I lightly chalked around the image with blue chalk for the sky and brown/green chalk for the ground.  I added some Cotton White Fun Flock mixed with fine Crystalina glitter to the teddy's hat using Designer Dries Clear adhesive.

I added Kindyglitz Crystlina glitter glue to the edges of the yellow star to make it sparkle a little.  Here is a wee close-up so you can see the fluffy glitter on his hat and the sparkliness on the star:


The designer paper is an older one from 2010 by Kaisercraft - Be Merry.  I love dotty paper and found a whole pile of this particular one in a stock clearance box last year. 

The red and green cardstock layers were trimmed to 1/8" using my Perfect Layers Tools.  The large star was diecut using a Joy! Crafts Christmas Stars die and the smaller stars were punched using a Carl CP-2 Star punch.  All the stars are up on dimensionals.  I punched the white cardstock base bottom with an EK Success Scalloped Scallops edge punch.

Lastly, I tied on the Christmas Candy - Trendy Twine and added Fray Stop to the cut ends to stop them from fraying.  If you are looking for this particular brand of twine, you can find it HERE at Annie's Paper Boutique.

Challenges:

I am entering my card in the following challenges -

Splitcoaststampers - December Fan Club Challenge - Time to Decorate
Note:  you have to be a (paid) Fan Club Member to play this challenge

Craftyhazelnut's Christmas Challenge #156 - Last minute cards or any not shown already 

Craftyhazelnuts's Christmas Challenge Extra - which is Anything Goes every month

*******************************

And now here is the card and tag my daughter gave to me:


Aren't they gorgeous?!!  My daughter used the Kaisercraft Santa's List range which I really love - such pretty colours.

On my next post, I will be sharing the Christmas card that I gave to my husband.  Thanks for stopping by to have a peek at my blog!

Jocelyn


Card Recipe:

Stamps:  Lili of the Valley (UK) James - Little Star ST082

Ink:  Ranger Archival Jet Black

Designer paper:  Kaisercraft Be Merry 12" x 12" (from 2010), red glitter cardstock, green glitter cardstock

Accessories:  Tombow Pens, Faber-Castell + Lyra + Albrecht-Durer watercolour pencils, paintbrush, dimensionals, Joy! Crafts Christmas Star die, Big Shot, Lifestyle Nesting Circle + Nesting Scallop Circle dies, Perfect Layers Tools, Designer Dries Clear adhesive, Trendy Twine - Candy Cane (red, green and white), Kaisercraft chalks, Stampendous Cotton White fun flock mixed with fine Crystalina glitter, cardstock:  green, red, Paper Mill white

Punches:  EK Success Scalloped Scallops edge, Carl CP-2 Star

Tuesday, December 24, 2013

Teddy Bear painted ornament


Hi blogging friends From Millan.Net

As my last post before Christmas Day, I thought I would share a Teddy Bear Christmas ornament that I painted a little while ago:


The teddy bear is a flat piece of craftwood and the original pattern is by Debbie Mitchell from one of her Cozy Cubby Collection tole/decorative painting books.  I painted the teddy using Jo Sonja acrylic gouache and once cured, varnished using water-based varnish.  I tied on a gold cord so I can hang it on my Christmas tree.  Lastly, I added the green bell.

**********************
 
Wishing you all a very happy Christmas and may all your dreams come true in 2014.  For those of you who find Christmas difficult, my heart goes out to you.

Thank you for all your comments, emails, support and encouragement throughout this year.  I will be back in a few days sharing a couple more Christmas cards which I am giving to my daughter and husband tomorrow (can't spoil the surprise as they read my blog!).  

Jocelyn XO


Sunday, December 22, 2013

MFT Joy Photo Card Frame Christmas card


Hi blogging friends From Millan.Net

I am sharing another Christmas card which I sent to my friend Terese in Canada - and now that Terese has the card, I can share it here on my blog.

After using the My Favorite Things Merry Photo Card frame die alot recently for some Clean and Simple cards (see my two blog posts HERE and HERE), I decided to buy the "Joy" version and here is the result:


I LOVE this die - but then I probably say that about ALL my dies LOL!

The deer and trees are a die by Cottage Cutz - Snow Swept Border.  The layers of snow were made using a set of 2 dies by MFT called Snow Drifts.  The largest snowflake is by Simon Says Stamp and the smallest snowflake is by Impression Obsession. None of these layers are up on dimensionals - they have simply been adhered using doublesided tape.  The shadows in the photograph may give you the impression that the layers are built up but in actual fact, the card is really flat.

The dry-embossed bottom panel is a retired Cuttlebug embossing folder:  Kars Snowflake which is extremely difficult to find.  A great alternative which is readily available is the Sizzix Dots embossing folder from the set:  "Christmas Words and Dots" which you can see here:


Once I had embossed my card front, I attached the scene/frame then just trimmed up the edges of the white cardstock base so that I had a thin border around the aqua frame although the angle of the photo makes it look a little uneven.  My white card bases are bigger than a Cuttlebug embossing folder which means I can just have the dry embossing within the scene and not spill over onto the card edges.

And here are the beautiful cards that my daughter and I received from Terese:


This first card was for my husband and me - and the second was for my daughter.  The RHS bottom oval on the 2nd card had my daughter's name on it and I edited it out for privacy reasons.   Aren't Terese's cards gorgeous?!!


Thanks for stopping by!  Only 3 sleeps to go here in Australia.......

Jocelyn


Card Recipe:

Stamps and Ink:  None

Designer Paper:  Aqua glitter cardstock

Accessories:   My Favorite Things Die-namics Joy Photo Card Frame die + Snow Drifts dies, Impression Obsession Die100-F snowflake die set, Simon Says Stamp Kate's Snowflake SSSD111309 die, Cottage Cutz Snow Swept border die, Big Shot, Cuttlebug Kars Snowflakes embossing folder (RETIRED), Kaisercraft Ice Blue SB774 rhinestones, doublesided tape, cardstock - white (Paper Mill)


Saturday, December 21, 2013

Lactose-free Fruit Mince Tarts

Hi blogging friends From Millan.Net

For something completely different to the norm, I thought I would share my lactose-free and citrus/apple/alcohol-free Mince Tarts with you after sharing my adapted recipe on Facebook with the Australian company:  Liddells - who have  a great range of lactose-free dairy products in Australian supermarkets.  Now I have no connection whatsoever to the company and this is not a sponsored blog post.  Nobody is paying me anything and I won't receive any free products for promoting any brands.  I am just very happy to support Australian companies who support our Australian farmers.  I grew up on a farm and it's very tough out there these days for our Aussie farmers trying to compete with cheaper overseas products.

Last year, I was diagnosed as being lactose-intolerant but I also have a severe allergy to citrus which I have had for many years.  I am also allergic to apple plus I don't drink alcohol - so I had to adapt the Mince Pie recipe from several different ones that I had in my recipe books.  I really love to bake and have always made my own biscuits and cakes.  I grew up helping Mum in the kitchen and it is something that I am passing into my own daughter.  It is so much cheaper to bake your own and you know what is in them. 

I have made several batches of the Mince Pies now and tweaked the pastry a little and although I have never made mince pies before, they were surprisingly easy and delicious.

I have used specific Australian brands of some products which I personally know to be safe for my particular allergies.  Sometimes companies do change their ingredients so you would be wise to check before using.

Pastry

Makes approximately 24 Mince Pies:  (note all measures are metric)

Ingredients

250 grams of Liddells lactose-free butter
5 tablespoons icing sugar
1 free-range egg
1/2 teaspoon Queens Vanilla Essence
3 cups of Wheatfields self-raising flour
1/4 cup of Liddells lactose-free milk
Small amount of extra icing sugar

Cream butter and icing sugar, add beaten egg, then sifted flour.  Work the mix together until smooth.  You can also put all the ingredients in a food processor if preferred and work mix until it just comes together.  Refrigerate in a glass bowl covered in cling wrap until ready to use.  Allow to soften a little before rolling out to 4mm thick on a floured board and use a circle cutter to cut out your mince pie bases.   

Place bases in cupcake tins (24 bases) and add your fruit mince.   Re-roll scraps and use a star cutter to cut out tops for your mince pies.   Brush tops of pies with a little milk and place in a moderate oven - 180 deg C fan-forced - and cook for around 14-15 minutes.  Leave in tins to cool a little before removing so pastry does not break.  Dust tops with the extra icing sugar.  Alternatively, you can sprinkle on CSR Dememera sugar or Masterfoods Vanillan Sugar prior to baking - both of which are delicious.  ENJOY!!

Fruit Mince

Ingredients

1-1/2 cups Sunbeam Sultanas

1-1/2 cups Sunbeam Currants
1 teaspoon of Masterfoods Mixed Spice
1/2 teaspoon of Masterfoods Cinnamon
1/4 teaspoon Masterfoods Nutmeg
75 grams of Liddells lactose-free butter, melted
1 cup Brown Sugar
1 teaspoon of Queens Vanilla Essence
Approx. 1-/2 cup IXL Apricot Jam

Coarsely chop fruit (this can be done in a food processor but keep a close eye on it so you don't chop it too finely) and place in a glass bowl then stir through all the other ingredients.  If mix seems a little dry, add a little more Apricot Jam.  Cover bowl with plastic wrap and leave in fridge for several days to allow the flavours to develop.  It will thicken up considerably over that time.   Allow fruit mince to come to room temperature before adding to pastry bases.

And here is the finished product:


Mmmmmm, they are delicious with a cup of tea after dinner.

Thanks for stopping by - have a great weekend! 

Jocelyn 


Friday, December 20, 2013

Penny Black After You Christmas card


Hi blogging friends From Millan.Net

And a special welcome to my newest follower on BlogLovin'!  Thank you for taking an interest in my craft.  

Today I am sharing another Penny Black Christmas card.  Yes, I do freely admit that I am a little obsessed with the Margaret Sherry Penny Black animals - I still love them as much today as when I first saw them about 10 years ago.  And I don't think that they go out of style - they are timeless in my humble opinion.  I picked up this particular stamp - After you - at the last Craft Show that I went to in October.  
Now that my wonderful friend C (hi C - From Millan.Net ) has the card in her hot little hands, I can share it here on my blog:
 

I stamped the image with Ranger Archival Jet Black ink onto watercolour paper and coloured it with a variety of mediums:  Tombow pens plus several brands of watercolour pencils.  I chalked around the image with blue chalk for the sky and added Cotton White Fun Flock mixed with fine glitter for the snow.  I added Kindyglitz Crystalina glitter glue to the envelopes that the hedgehogs are holding.

The designer paper is by Kaisercraft - Santa's List which was released a few months back.  This is the first year that I have barely bought any Christmas papers as I have been "shopping my stash of papers" this year which was my 2013 Resolution.  Mind you, I do have plenty of Christmas papers in my stash already and I am not likely to run out any day soon so it's not like I need any LOL! 

I used my Perfect Layers Tools to trim the borders:  1/8" for the base and 1/16" for the layers.

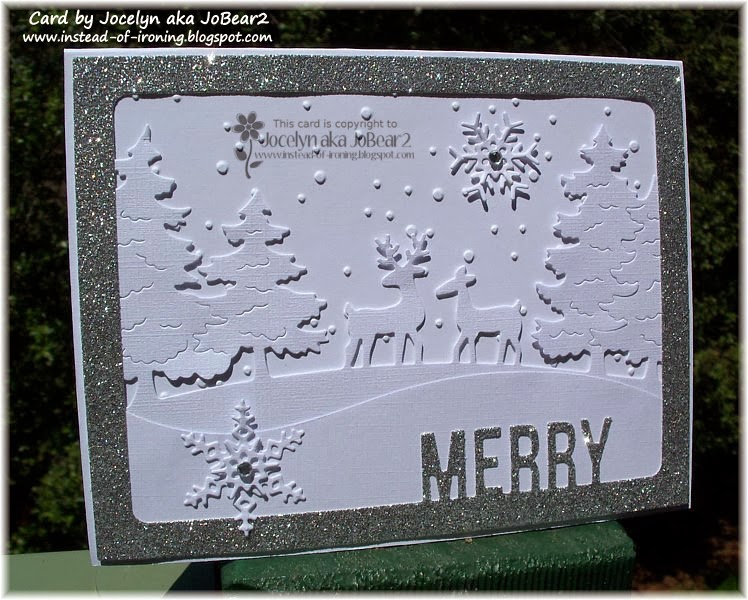
The sentiment panel was diecut using my Big Shot and one of my Spellbinder Tags Trio dies.  I inked around the panel with Tea Leaves chalk ink.

The snowflake was diecut from white glitter cardstock and I only glued the centre down and bent up the points a little to give it some dimension.

The red and white twine I originally bought (several years ago now) from Sharon Johnson's online store (in the USA) and it is still available.  It is called Holiday Twisted Rope and comes in 2 colourways:  red/green and red/white - and you can find it HERE.  I have never seen it anywhere else - but if you do find it at a store in Australia, could you let me know?  I will say that although I love this rope and it is beautiful and soft, it does unravel easily and fray really badly and you must knot it at the end before you trim it as I have done on my card or you will WISH that you had (don't ask me how I know!).  It is also quite bulky on a layered card so it makes your card quite thick.

****************************

On a personal note, school finishes for the year for my 10 year old daughter today which is fantastic and now we have about 5 weeks break.  YAY!  We aren't going away on holidays so I will still be blogging inbetween a few hospital appointments for my loved one.  Birthdays in my extended family start from the 4th of January so I'll have to put away my Christmas hat very soon and put on my Birthday hat instead or the cards won't arrive until after their birthday!

I do still have some Christmas cards that I am just putting the finishing touches on to share on my blog - and some I can't share till they are opened on Christmas Day because the recipients read my blog - so I will share them post-Christmas (hope that's OK?). 

Thanks for stopping by!

Jocelyn


Card Recipe:

Stamps:  Penny Black After You 4093K wood-mount, Sentiment Penny Black from Christmas Friends 30-084 clear set

Ink:  Ranger Archival Jet Black ink, Versamagic Tea Leaves chalk

Designer paper:  Kaisercraft Santa's List 6-1/2" x 6-1/2" pad

Accessories:  Big Shot, Crafter's Companion Embossalicious Holly embossing folder, Spellbinders Tags Trio die set, Snowflake - Impression Obsession DIE100-F, 140lb watercolour paper, Tombow Pens, Faber-Castell + Albrecht Durer + Lyra watercolour pencils, paintbrush, Kindyglitz Crystalina glitter glue, Stampendous Cotton White Fun Flock mixed with fine Crystalina glitter, Tombow Mono Multi glue, Kaisercraft blue chalk, Kaisercraft rhinestones SB711 red + SB709 mint green, dimensionals, Perfect Layers Tools, red/white holiday twisted rope, cardstock - red, green, white, white glitter

Tuesday, December 17, 2013

Penny Black Naughty or Nice?


Hi blogging friends From Millan.Net

Today I am sharing a Christmas card using a fun image by Penny Black:  Naughty or Nice.  I had to make a bigger card base to accommodate the long image so used a business/DL sized base:


The image was stamped onto watercolour paper using Versafine Onyx Black ink and coloured with Faber-Castell + Lyra watercolour pencils and a small, round paintbrush.  I chalked around the image with blue chalk for the sky. I added Stampendous Cotton White fun flock mixed with fine Crystalina glitter for the snow on the ground plus the snowflakes; I adhered it using Designer Dries Clear Adhesive.  Here is a wee close-up:


The sentiment is by Hero Arts and I added a red rhinestone at each end.  All the panels were trimmed to 1/8" using my Perfect Layers Tools.  The ribbon was attached in a 2 separate elements and the bow itself was made with my Bow Easy.  I added Fray Stop to the cut ends to stop them from fraying.

The side panel was embossed using an embossing folder from the Sizzix Powdered Sugar set.  The snowflakes are by Jesse James - Snowflake Collection - Snow Globe - and were glued on using Crafter's Pick Incredibly tacky glue.

Challenges:

I am entering my card in the following challenges -

Penny Black Saturday Challenge - December - Christmas 

Penny Black and More/Allsorts - December - Traditional Christmas Colours

Splitcoaststampers Free for All F4A199 - Christmas Carols - this is my 2nd card for the challenge and this time my song inspiration is "Winter Wonderland" (one of my favourite Christmas songs) - in particular, the line:  "In the meadow we can build a snowman."

Thanks for stopping by and for any comments you care to leave - they are very much appreciated at this very busy time of year!  Can't believe it is only 1 week to Christmas!  Wow!

Jocelyn


Card Recipe:

Stamps:  Penny Black Naughty or Nice? 3282L wood mount, Sentiment from Hero Arts Merriest Christmas Wishes clear set CQ377

Ink:  Versafine Onyx Black

Designer Paper:  Kaisercraft Be Merry 12" x 12" (from 2010)

Accessories:  140lb watercolour paper, Faber-Castell + Lyra watercolour pencils, Stampendous Cotton White Fun Flock mixed with fine Crystalina glitter, Perfect Layers Tools, Kaisercraft red rhinestones, Big Shot, Sizzix Powdered Sugar embossing folder set, Bow Easy, green satin ribbon, Fray Stop, Kaisercraft blue chalk, Jesse James Snowflake embellishments - Snowflake Collection - Snow Globe, Crafter's Pick Incredibly Tacky Glue, Designer Dries Clear Adhesive, cardstock - red, green

Punches:  EK Success Scalloped Scallops edge

Sunday, December 15, 2013

JustRite Christmas Treasures card


Hi blogging friends From Millan.Net

I had totally forgotten about some JustRite stamps that I bought a couple of years ago as I had put them in a folder and they were up on the shelf with some other totally unrelated folders - out-of-sight, out-of-mind!  Anyway, I thought I should drag them out and put them to use.  JustRite Stamps originally had their own wood blocks in various sizes and the size that I used was a 3-1/4" round block.  These stamps are still around here and there - and I saw the set that I have on Frantic Stamper's website (I have never bought from them so can't recommend them).

I (again), went for a clean and simple Christmas card as the silver version is for my Mum - the gold version is for myself:


I stamped the 3 Wise Men and sentiment onto the white cardstock using Versamark Watermark ink and heat-set it using Ranger silver detail embossing powder - and diecut them using my Big Shot and Lifestyle Circle dies.  The outer circle is up on dimensionals.

The dry embossing is a Nellie Snellen Christmas Square embossing folder which I really love.  To finish off, I added 4 silver rhinestones.  Finished size is 5 inches square or 127 millimetres.

And now the gold version:


I decided to add a gold glitter cardstock layer plus another white layer as I didn't have any gold rhinestones/pearls for embellishing (do they make them as I have never seen any?!) and the card just didn't look finished - there was something missing.  I trimmed the gold layer to 1/8" using my Perfect Layers Tools and the white layer to 1/16".

The image and sentiment were stamped with Versamark Watermark ink and heat-set using Ranger gold detail embossing powder.  The outer circle is up on dimensionals.  Finished size is 5-3/8" square or 136mm.

Challenges:

I am entering my card in the following challenges -

Splitcoaststampers Free for All F4A199 Christmas Carols - make a project inspired by a Christmas song (or anything holiday and musical), song lyrics, instruments, red nosed reindeer etc.  My cards are inspired by the Christmas Carol:  We 3 Kings of Orient are.

CAS on Sunday Challenge #23 - Christmas

Crafty Catz Challenge #211 - Anything Goes

Thanks for stopping by! 

Jocelyn


Card Recipe:

Card #1 -

Stamps:  JustRite Christmas Treasures set - 3-1/4" diameter

Ink:  Versamark Watermark

Accessories:  Big Shot, Lifestyle Circle dies, dimensionals, Nellie Snellen Christmas Square-1 EFE004 embossing folder, Ranger silver detail embossing powder, heat-gun, cardstock - white (Paper Mill), Kaisercraft Silver rhinestones, JustRite 3-1/4" diameter wood block

Card #2 -

Stamps:  JustRite Christmas Treasures set - 3-1/4" diameter

Ink:  Versamark Watermark

Accessories:  Big Shot, Lifestyle Circles dies, dimensionals, Nellie Snellen Christmas Square-1 EFE004 embossing folder, Ranger gold detail embossing powder, heat-gun, JustRite 3-1/4" diameter wood block, Perfect Layers Tools, cardstock - white (Paper Mill), gold glitter

Friday, December 6, 2013

Eliza Snowflake clean and simple Christmas cards


Hi blogging friends From Millan.Net

I am typing up this post on a new (well, 2nd-hand re-furbished) laptop.  I had been having a few problems with my old laptop as the socket on the back of my laptop where the charger/power cord plugs in was getting loose and my laptop wouldn't be running off the mains power some of the time and therefore running off the laptop battery.  Now my battery has been crook for a while and only able to hold a small amount of charge - and in the past few weeks, it had worsened to the point where it would only hold about 5 minutes of charge. I had resisted spending the $70 to get a new one because, well $70 is alot of money and I had just spent $$ on replacing the keyboard.  BIG mistake!  Trouble was that when I was busy on my laptop, I wouldn't necessarily notice that the charger/power cord had moved slightly in the socket so my computer wasn't charging and then my laptop would suddenly shut down when the 5 minutes of battery back-up had run out which it did about 10 times over last weekend as the charger socket just seemed to get looser and looser.  

The last time it shut down, it damaged the hard drive....OOOPS!!  Computers do NOT like shutting down unless they are shut down properly!  It took hours of work to get it up and running again - it wouldn't even turn on at one stage - but I can't use it unless I get a new battery and a new charging socket - and there are still some problems to fix.   Sheesh, I was sooooo grumpy and annoyed:  I love computers but when things go wrong, it is probably the one thing that puts me in such a bad temper as I am the "fix-it" person for all things computer in our house - and it can take up so much time to fix them sometimes to no avail.

Anyway, my lovely husband went out last week and bought me another laptop and if I can fix the old one completely, my husband will take it over as his laptop screen is covered in lines due to it wearing out and is really old now and so slow in comparison.  I heartily recommend replacing a sick laptop battery and replacing the charger socket as you can easily buy them as long as your laptop isn't too old.  I have definitely learned my lesson the hard way!

Anyway, I am still catching up on things and with Christmas on our doorstep, I am frantically whipping up cards.  Today I am sharing some clean and simple Christmas cards which I have made for my Mum to post to her friends/family.  Mum is frail and has difficulty using her hands so I had to have mail-friendly and flat cards that are easy for her to handle.  If I had a ribbon on them and the ribbon came untied, she wouldn't be able to re-tie the ribbon.  And they had to be easy for her to put in an envelope so too many layers that made the card difficult to put in just wasn't going to work for her. So here is what I came up with which I have made multiples of and had a little production line going in my Craft Room:


The gorgeous snowflake is a die by Simon Says Stamp - Eliza Snowflake - which I ran through my Big Shot using the glitter cardstock.  I did run it through my Big Shot several times moving the die around each time as being such a detailed die and the glitter cardstock being quite thick meant it didn't cut cleanly on just one pass.  I glued the snowflake on using Tombow Mono Multi-glue which I applied with a small paintbrush.

I glued on a glitter cardstock strip to the top of the white cardstock front, border punched the bottom then glued on the glitter cardstock strip underneath the white cardstock front (I hope that makes sense!).  I thought I had better explain how I did it because you may think that I glued the white cardstock front to the glitter cardstock base instead as it's a little hard to tell from the photo.

Now here is the silver version:


The approximate sizes of my finished cards are as follows:

Card #1 - 4-11/16 inches wide x 4-9/16 inches long (120mm x 115mm)
Card #2 - 4-1/2 inches wide x 4-7/16 long (113mm x 112mm)

I really didn't think the cards needed a sentiment - and anyway, I am not sure where I would put one!  Even though the cards were simple to make, they are quite fiddly as handling the snowflake with glue and trying to get it level and straight takes some time.  I used my ruler to mark where the centre of the card was so that I could use the marks to line up the snowflake perfectly.  I often think that when you make a clean and simple design, you need to put quite alot of thought into it to get it "balanced" and looking right because having one element askew really stands out compared to a layered card.  Personally, I find them very challenging and I have some cards that I've made that just "don't look quite right":  I don't know what's wrong with them, whether it's not balanced or something is missing (?), but they sit in my pile waiting for me to go back to them later on one day (we ALL have those cards, don't we LOL?!).

Challenges:

I am entering my card in the following challenges -

Craftyhazelnut's Christmas Challenge Extra - December - Anything Goes
Christmas Card Challenges #1 - No Stamping
Splitcoaststampers - Free for All F4A197 - Let it Snow

Thanks for stopping by!  Have a great weekend!

Jocelyn


Card Recipe:

Card #1 -

Stamps, Ink and Designer paper:  None

Accessories:  Simon Says Stamp Eliza Snowflake SSSD111308, Big Shot, Tombow Mono Multi glue, EK Success Scallop Diamond border punch, cardstock - white, aqua glitter

Card #2 -

Stamps, Ink and Designer paper:  None

Accessories:  Simon Says Stamp Eliza Snowflake SSSD111308, Big Shot, Tombow Mono Multi glue, EK Success Scalloped Scallop border punch, cardstock - white, silver glitter


Saturday, November 23, 2013

More MFT Photo Card Frame die Christmas cards

Hi blogging friends From Millan.Net

If you read my last post, you will have seen 2 Christmas cards that I made using the newly released My Favorite Things Die-namics Photo Card frame die.  Today, I am sharing another two cards which are very similar - the only differences being the dies and the colour of the glitter cardstock.  I finally had some time in my craft room inbetween medical appointments to put the elements together.  I must admit, I really LOVE the aqua glitter cardstock one - but I do love any colour that is in the aqua/turquoise range.


My first card uses the Memory Box Country Landscape die for the main panel.   The top RHS snowflake is a Simon Says Stamp Kate's Snowflake die and the bottom LHS is a My Favorite Things Die-namics snowflake die from the Snowflake Trio set.  I added an Ice Blue Rhinestone to the centres.

The dry embossing is a Cuttlebug Kars Snowflake embossing folder which is RETIRED and virtually impossible to find online.  You can substitute the Sizzix Dots embossing folder from their set:  Christmas Words and Dots, Item #658285, which is readily available online.  Here is a pic of the set:


And now, the gold glitter cardstock version:


For this version, I used the Cottage Cutz Winter Wonderland border die for the main panel and then added another layer of snow using a My Favorite Things Die-namics Snow Drifts die.  Instead of adding white snowflakes, I decided to add gold glitter cardstock snowflakes instead.  The gold glitter cardstock is a lot brighter and paler in real life - looks a little dark in the photo but is really hard to photograph glitter cardstock and find the right balance of showing some glitteriness yet not over-exposing the white portions in the process.  You often end up with a lovely glittery frame and a washed out image!  Wish my camera could see what I actually see with my eye - maybe that will happen one day with better technology (?).

For in-depth details on how I made the card, please see my post from a few days ago HERE where I shared my silver glitter cardstock and red glitter cardstock versions.

Challenges:

I am entering my card in the following challenges -

Christmas Cards All Year Round - November Challenge - Winter Wonderland - card must have a winter theme. Snow, snowflakes etc.

ABC Christmas Challenge - W for Winter Wishes

Splitcoaststampers - Fan Club November Christmas Challenge - Window In/Out - where you need to create a Christmas view either in through a window eg: Christmas tree, decorations or out through a window eg: snowy scene.  Now technically I don't see a wintry scene out my window at Christmas but I have lots of friends and/or relatives in the UK, USA and Canada who tell me that all they see is snow - and these cards will be going to them.  Please note that you have to be a (paid) Fan Club Member of SCS to be able to play these challenges.

Splitcoaststampers - Clean and Simple Challenge CAS247 - Inspired by Music.  My cards are inspired by the song:  Winter Wonderland - which I used to sing in my All Girls Group which I was part of for over 10 years before my loved one became ill.  I am singing it now as I type this:  "Sleigh bells ring, are you listening?  In the lane, snow is glistening.  A beautiful sight, we're happy tonight, walking in a Winter Wonderland."  LOVE it - one of my favs!  We would visit Nursing Homes/Hostels in the area where we live at Christmas-time and sing a huge range of Christmas songs which the residents really loved. 

It was amazing to see how even the residents who could no longer communicate and would often appear to be asleep or just not looking at you nor appear interested, would have little finger or their foot tapping away at the beat of the music.  We used to sing at school fetes, charity functions and local events but I used to love singing at the Nursing Homes the most.  We would visit them at other times of the year too - and they appreciated so much that people would come to sing to them! 

I can't believe it is only about a month to Christmas!  Yikes!  I had better high-tail it to my craft room and get cracking on some more cards!

Thanks for stopping by.  Have a fab weekend.

Jocelyn


Card Recipe - Card No. 1:

Stamps and Ink:  None

Designer paper:   Aqua glitter cardstock

Accessories:  My Favorite Things Die-namics Photo Card Frame die + Snow Drifts die + Snowflake Trio die set, Simon Says Stamp Kate's Snowflake SSSD111309 die, Big Shot, Cuttlebug Kars Snowflakes embossing folder (RETIRED), Kaisercraft Ice Blue SB774 rhinestones, doublesided tape, cardstock - white (Paper Mill)

Card No. 2:

Stamps and Ink:  None

Designer paper:  Gold glitter cardstock

Accessories:   My Favorite Things Die-namics Photo Card Frame die + Snow Drifts die, Cottage Cutz Winter Wonderland border die, Impression Obsession Die100-F snowflake die set, Big Shot, Cuttlebug Kars Snowflakes embossing folder (RETIRED), doublesided tape, cardstock - white (Paper Mill)

Tuesday, November 19, 2013

MFT Photo card frame Christmas cards


Hi blogging friendsFrom Millan.Net

I can't believe how quickly November is flying by:  I am sure the year speeds up once November hits!  It sure seems like it every year.  I have been beavering away in my Craft Room in-between alot of medical appointments this month with my loved one.  Thankfully, they are doing well even if their recovery is long and slow and challenging - and I am so grateful for the times that we can cherish together no matter whether we are travelling in peak-hour traffic coming home from hospital or just sitting for ages in a medical waiting room.  Life is so fragile and you have to make the most of these moments together no matter where you are because you don't know what is around the corner.

The card I am sharing today is a clean and simple design based around a new My Favorite Things die called Photo Card Frame.  When I first set my eyes on this die, I had all sorts of ideas running through my head.  I think the main idea behind the die is to take a Christmas photograph of your family, pets or something Christmassy and pop it into the frame - but I had other ideas of using dies to make a simple scene within the frame - and here is the result:


I diecut the frame out of silver glitter cardstock then attached the diecut elements to that before attaching the finished frame to my card front.  I used my Cottage Cutz Snow Swept border die for the main part of the scene and a My Favorite Things Snow Drifts die to add the extra layer of snow.  None of the layers are up on dimensionals - they are just layered together with doublesided tape.  Even though the Snow Swept border diecut looks like it is up on dimensionals, it just merely the dry embossing that it is on top of that bumps it up a little to look that way.  The snowflakes are by Impression Obsession.  I glued down just the snowflake centres and bent the tips up a little to add a little dimension to them and added a silver rhinestone to the centre.

I ran my white cardstock card front through my Big Shot using the (retired) Cuttlebug Kars Snowflake embossing folder.  If you do not have this folder - plus it is virtually impossible to find online - you can substitute the Sizzix Dots embossing folder from the set Merry Christmas Words and Dots Item #658285 which is readily available.  You can see a little pic of it here:


Once I had embossed my card front, I attached the scene/frame then just trimmed up the edges of the white cardstock base so that I had a thin border around the silver frame although the angle of the photo makes it look a little uneven.  My white card bases are bigger than a Cuttlebug embossing folder which means I can just have the dry embossing within the scene and not spill over onto the cards edges.

While I was on a roll, I made another scene, this time using red glitter cardstock:


Again, I used the same embossing folder for the background snow - just a different die for the scene which in this case, is the Memory Box Deer Trio die.  The top right-hand snowflake is by Simon Says Stamp:  Kate's Snowflake and the bottom left-hand snowflake is the smallest of the 3 dies in the My Favorite Things Die-namics Snowflake Trio set.  Again, I glued down the snowflake centres and bent the points up a little and added a red rhinestone to each centre.  The white cardstock base edges (again!) look uneven in the photo but they are perfectly even in real life:  just the angle of the photo trying to capture a little of the red glitteriness plus the embossing which make it look a little weird.

I can see myself using this Photo Frame die ALOT - and you could even just cut off the words if you didn't want them and stamp a different Christmas sentiment - or use the frame for another occasion.  Yep, one of those really useful dies which I will definitely get my money's worth out of.  

I have a couple of other scenes in the pipelines - watch this space!

Challenges:

I am entering my cards in the following challenges -

Christmas Card Weekly Challenges (by Sparkle Creations) - Challenge #51 - Sparkle and Bling.  My sparkle and bling is the glitter cardstock and rhinestones.

Totally Papercrafts Friday Challenge #193 - Clean and Simple

Splitcoaststampers Fan Club Christmas Card November Challenge - Window In/Out into Christmas.  Create a window scene at Christmas time eg: something you see when you look out your window at Christmas such a snow covered trees, snowmen, streets lined with snow - or when you are looking inside a window such as table decorations, tree, presents.  Now of course, being Australian, we don't have snow at Christmas-time because it is summer so I am not looking out my window at snowy scenes but I have friends and/or relatives in Canada, USA and the UK and I send them cards depicting their snowy winters - so my card depicts what THEY see out their window instead LOL!   Please note you have to be a (paid) Fan Club Member of SCS to be able to play in these challenges.

Thanks for stopping by!  Hope to see you again soon.

Jocelyn


Card Recipe - Card No. 1:

Stamps and Ink:  None

Designer paper:  Silver glitter cardstock

Accessories:  My Favorite Things Die-namics Photo Card Frame die + Snow Drifts die, Impression Obsession Die100-F snowflake die set, Cottage Cutz Snow Swept Border die, Big Shot, Cuttlebug Kars Snowflakes embossing folder (RETIRED), Kaisercraft silver SB700 rhinestones, doublesided tape, cardstock - white (Paper Mill)

Card No. 2:

Stamps and Ink:  None

Designer paper:  Red glitter cardstock

Accessories:  My Favorite Things Die-namics Photo Card Frame die + Snowflake Trio set (smallest snowflake die), Memory Box Deer Trio die, Simon Says Stamp Kate's Snowflake SSSD111309 die, Big Shot, Cuttlebug Kars Snowflake embossing folder (RETIRED), Kaisercraft red SB711 rhinestones, doublesided tape, cardstock - white (Paper Mill)

Related Posts Plugin for WordPress, Blogger...