Hi blogging friends Whew, sure is hot here today - 42.7 deg C (that's just short of 109 deg F if you are imperial)! Good for catching up on stuff indoors - like cleaning my Craft Room. It never ceases to amaze me how much mess I can make just from making a few cards - although I am sure I am not alone, hee hee! Today I am sharing another Christmas card which I made on Christmas Eve - and I gave this one to my daughter.
This is also my 2nd card for each of the following Challenges:
Holly Jolly Christmas Challenge - December - Anything Goes Craftyhazelnut's Challenge Extra - December - Anything Goes
The image is by Stampendous and is retired but is just so adorable, don't you think?! I stamped the image onto watercolour paper using Ranger Archival Jet Black ink and coloured it with Faber-Castell watercolour pencils using a #2 round paintbrush. I added dots of white acrylic paint onto the bear's scarf using a very fine stylus as well and I painted a fine white line down the centre of the candy cane for a highlight using a Liner brush. I lightly chalked around the image with Kaisercraft blue chalk and added snow using Stampendous Cotton White Fun Flock mixed with fine Crystalina glitter - which was also used to add fuzz to the hat. Here is a close-up:
I popped the image panel up on 2mm dimensionals.
The green dry embossing is an embossing folder by Crafts Too - Christmas Holly Frame. I layered the panel onto some red cardstock and trimmed the layers to 1/16" using my Perfect Layers Tools. I added the red reindeer ribbon from my stash then attached the panel to a white cardstock base.
The sentiment is by Elzybells (sadly no longer in business but Penny Black has reissued some images over the past few years) - and was diecut using a Cuttlebug Tiny Tags die. I added a tiny Couture Creations red rhinestone at each end of the sentiment panel. I tied the tag on using Doodlebug Ladybug twine and added a dimensional to hold the tag firmly to the cardstock. I added Fray Stop to the cut ends of the twine to stop it from fraying/unravelling.
Lastly, I adhered the glittery sparkly snowflake from my stash using Crafter's Pick Incredibly Tacky glue. Thanks for stopping by. Jocelyn Card Recipe: Stamps: Stampendous Candy Bears E208 (retired), Sentiment: Elzybells Mini Messages - Christmas clear set 20-054 (retired)
Ink: Ranger Archival Jet Black
Designer Paper: None Dies: Cuttlebug Tiny Tags Accessories: Cuttlebug, Crafts Too Christmas Holly Frame, Perfect Layers Tools, Doodlebug Ladybug twine, red/white reindeer ribbon (stash), Fray Stop, Couture Creations tiny red rhinestones, Stampendous Cotton White fun flock mixed with fine Crystalina glitter, Tombow Mono Aqua glue, Stampin' Up Fuse Fast adhesive, Crafter's Pick Incredibly Tacky glue, 2mm dimensionals, snowflake embellishment (stash), Jo Sonja white acrylic gouache, stylus, #2 round + liner paintbrush, Faber-Castell watercolour pencils, 140lb watercolour paper, Kaisercolour blue chalk, cardstock - red, green, white
Hi blogging friends As promised (if you managed to catch my last post), over the next week, I am sharing a couple of Christmas cards that I made at the last minute just before Christmas (as I had been unwell again since November) - and the card I am sharing today, I gave to my husband. Luckily, he doesn't mind cute and sweet so that makes life very easy :-) And I started it on the 23rd December and finished it on the afternoon of the 24th - inbetween doing a couple of other Christmas cards!
This is also my card for the following Challenges:
Penny Black Saturday Challenge - December - Christmas/Holidays Holly Jolly Christmas Challenge - December - Anything Goes Craftyhazelnut's Challenge Extra - December - Anything Goes
The card base is KW Doggett Knight white smooth cardstock and first of all, I worked out where I was going to stamp the image so I knew where to do the bottom dry embossing. The snowflakes embossing is a border folder from an older Cuttlebug (Provocraft) set called Winter Borders. This set is still readily available in Australia - not sure about the rest of the world as I rarely buy from overseas these days and therefore can no longer recommend any stores. You can check out my favouriteAustralian suppliers at the tab just under my blog header. I added a score line above and below the embossing using a Martha Stewart Mini Score board and trimmed off the excess cardstock at the bottom. I punched a scrap of aqua glitter cardstock using an EK Success Scalloped Scallops border punch then attached it using Ranger Wonder tape. The image is from a Penny Black clear set called 'Christmas Friends' and was stamped using Memento Tuxedo Black ink. I coloured the image using Prismacolor + Derwent Coloursoft pencils, paper stumps and Odourless Mineral Spirits ie: using the Gamsol Magic aka Magic Coloured Pencil technique. I actually messed up the colouring on the bird as I coloured him in red and orange and it looked awful against the coolness of the colours on the hedgehog - so I simply restamped and coloured it in the blue and green hues and cut it out, went around the edges with a black Copic multiliner and glued it over the red and orange bird. Here is a close-up:
You can't even really tell unless you look super-hard can you?! I went over all the images with a black Copic multiliner for any lines that needed darkening up and also the eyes which does make a big difference to how nice the final image looks. I went over the scarf using a Wink of Stella clear glitter brushbut you can't tell in the photo; it does add a soft sparkle that I can get away with on a guy's card (well, for my husband at least!). I also added some blue chalk around the image and Cotton White Fun Flock mixed with fine Crystalina glitter on the bottom for snow. The snowflakes were punched from aqua shimmer cardstock and a Martha Stewart Snow Flurry edge punch ie: they are the leftover punchies. I added some tiny Couture Creations silver rhinestones to the centres. For the top panel: I punched some scrap white cardstock using my Martha Stewart Icicles edge punch then ran the panel through my Big Shot using the same snowflake border I used on the bottom. I added a small strip of aqua glitter cardstock using Ranger Wonder Tape then attached the panel to my card using Stampin' Up Fuse Fast adhesive. Lastly, I tied on some aqua organza ribbon from my stash and added some Fray Stop to the cut ends to stop them from fraying. I didn't add a sentiment 'cos I couldn't figure out where to put one and just put one on the inside! Thanks for visiting my blog today. I'll be back soon with another one of my Christmas cards.
Jocelyn Card Recipe: Stamps: Penny Black Christmas Friends clear set 30-084 Ink: Memento Tuxedo Black Designer Paper and Dies: None Accessories: Big Shot, Cuttlebug Winter Borders set 37-1928, Prismacolor + Derwent Coloursoft pencils, paper stumps, Art Spectrum Odourless Mineral Spirits, Copic black fine multiliner, Wink of Stella clear glitter brush, Stampendous Cotton White Fun Flock mixed with fine Crystalina glitter (for snow), Kaisercraft blue chalk, Couture Creations tiny silver rhinestones, Ranger 1/4" Wonder tape, Tombow Mono Aqua adhesive, Stampin' Up Fuse Fast adhesive, Aqua organza ribbon (stash), Fray Stop, Martha Stewart Mini Score Board, Cardstock: KW Doggett Knight white smooth, aqua shimmer, aqua glitter Punches: Martha Stewart Icicles + Snow Flurry edge, EK Success Scalloped Scallops border
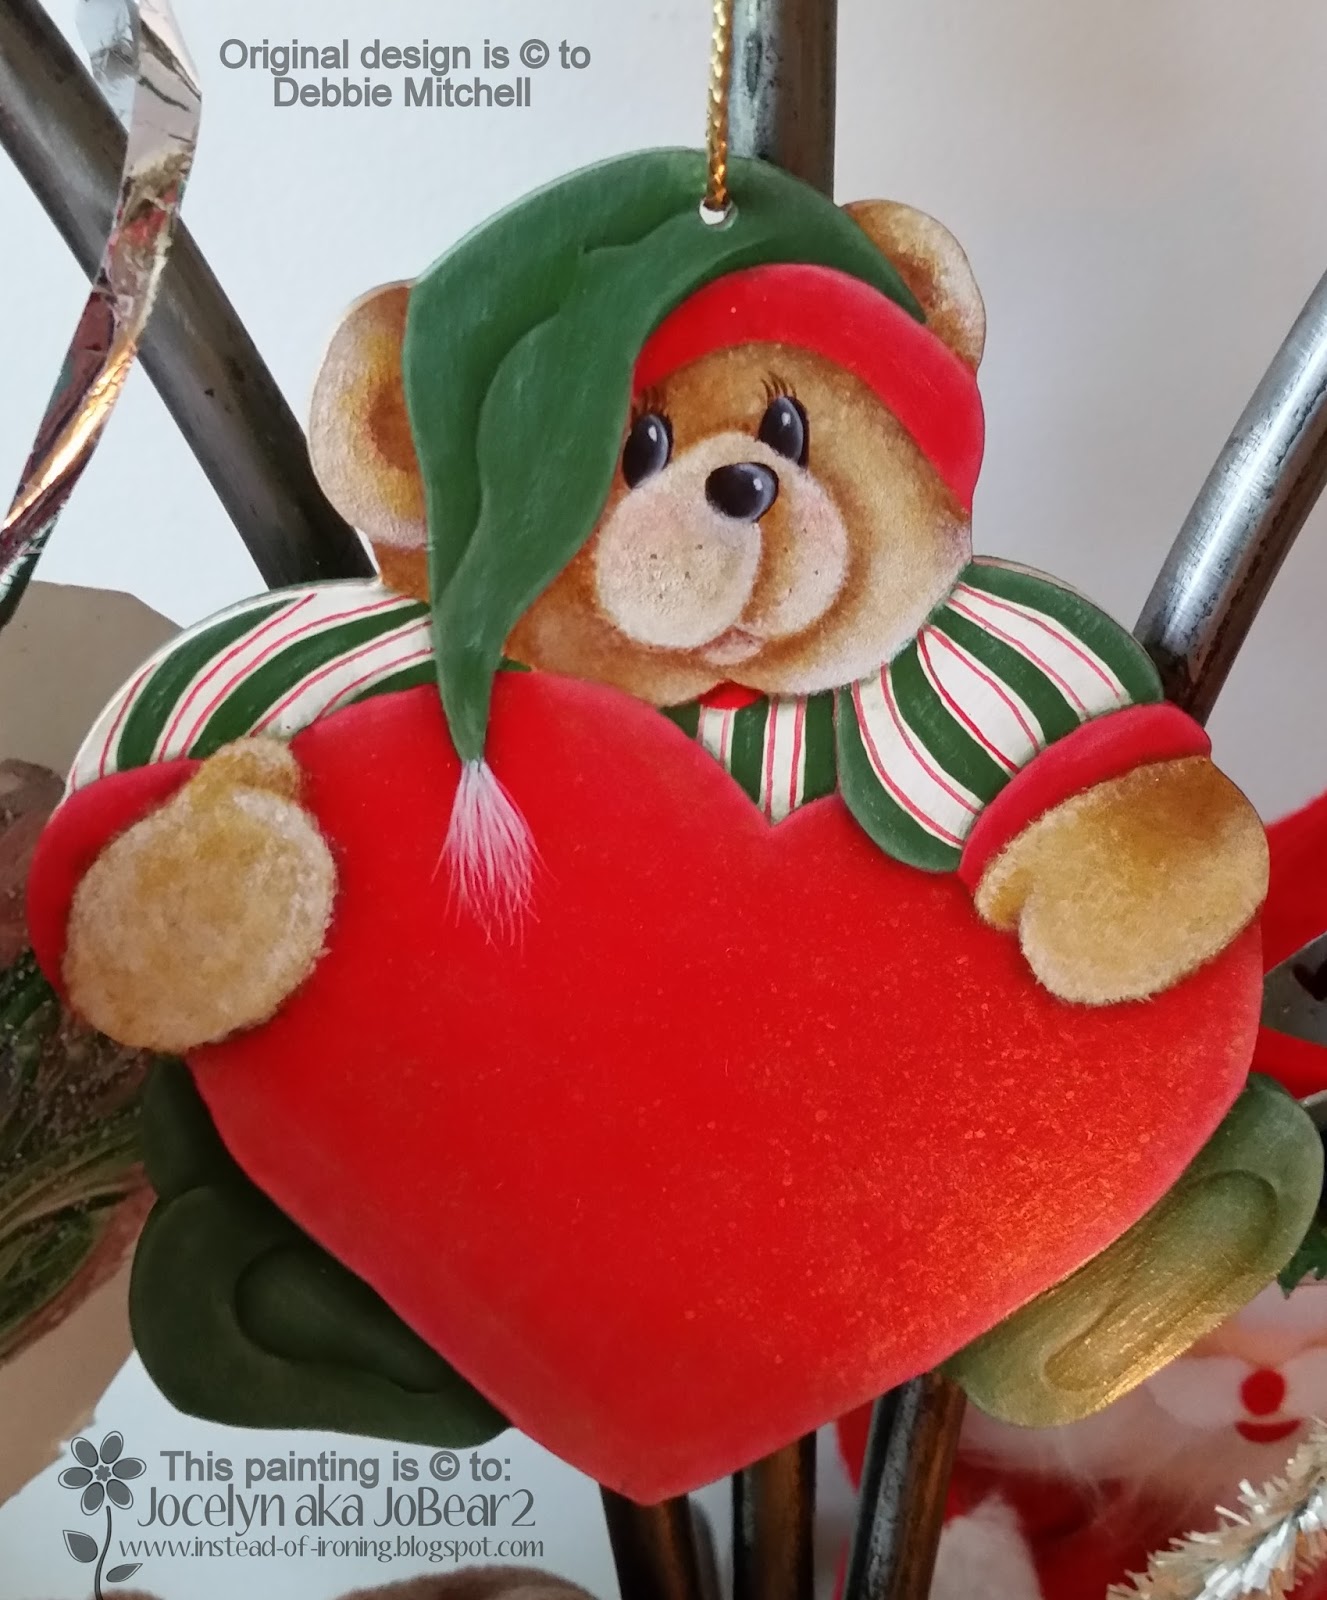
Hi blogging friends Please excuse my absence of blogging. I became sick again during November (just when I thought I was almost back to being reasonably OK) so my cardmaking has been non-existent until just before Christmas. I only made a couple of cards this year and will share them over the next week or so. In the meantime, I thought I would share a teddy bear ornament that I painted for my brother and his family a while ago:
The original design is by Debbie Mitchell from one of her Cozy Cubby decorative painting books. The craftwood cutout was sealed using Jo Sonja Clear Sealer then painted using Jo Sonja acrylic gouache. I used a deer's foot brush to make the teddy bear's fur look fluffy and remainder of the design was painted using round, flat and liner brushes in various sizes. The ornament is all one layer so I had to be careful to adding plenty of shading and highlighting to make the various elements look 3-dimensional. The gold on the right foot is actually reflection from a candle which was lit close by. The heart was splattered with gold paint which you can just see a little of on the RHS. Once the painting had cured (around 2 weeks), the item was sealed using Jo Sonja waterbased varnish. All I had to do then was add some gold cord for hanging up the ornament.
And just because I love my cat, I thought I would share a couple of pictures of Ruby enjoying the morning sun coming through our Dining Room window next to her scratching post:
And lastly, I wanted to share a video that I made of Ruby playing with her Catnip sausage which Santa gave to her last Christmas and that she still (surprisingly!) playing with. If you want to see a larger picture, click through to the You-Tube link on the bottom RHS of the video.
For those of you who celebrate Christmas, I hope that this Christmas season will be everything that you would wish it to be - and may all your dreams come true in 2016. Thank you for supporting my blog during 2015. Jocelyn xx
Hi blogging friends - I'm Jocelyn - aka JoBear2 on Splitcoaststampers. I am an Introvert and have been married to my best friend for 33 years last April and are a Mum to a beautiful 19 year old daughter who has severe hearing loss. I started my cardmaking journey in 2008 but also dabble in other crafts such as embroidery, knitting, crochet, decorative painting (folk art), photography and gardening. I am a crossword addict esp. cryptic crosswords and love to play the piano. I also love baking biscuits & cakes & watching my football club - Geelong Cats on the TV: I just can't seem to find the time to do ANY ironing LOL!
This Blog is dedicated to my American sister-in-law who has ALWAYS been a constant source of encouragement and enthusiasm to my cardmaking, and who first suggested that I start a Blog to showcase my cards.
Hi - I'm Jocelyn from Victoria, Australia. Thanks for having a peek at my Blog. Hope you enjoy your stay and please don't be afraid to leave a comment - I LOVE reading them and then I can come and visit you too. All content on this blog is copyright to me. Since February 2012 I have been caring full-time for a family member diagnosed with a life-threatening illness so my posting isn't as regular as I would like it to be.
None of my cards are for sale and I am unable take part in image swaps nor stamp images to share - nor do I do Commissions. My enjoyment is solely to make cards to give to friends and family: I just LOVE making cards :-)
I do hope that my cards give you inspiration to make your own but please don't take my original artwork and copy it exactly the same for publication in a magazine, contest submission, challenge blogs or for personal monetary gain eg: E-Bay, Etsy etc.
You are NOT permitted to use any of my cards as samples to help sell any of the products that I use on my cards or projects on any website eg: EBay, Etsy, Online Store etc. as this will infringe my Copyright as I am the intellectual owner of said artwork. Use of my cards without my permission will be reported to the website in question for Copyright Infringement so that they can take the appropriate action required by law. If you do not understand the implications of breaching Copyright Law, you would do well to verse yourself of this information to protect your reputation as a Seller/Store Owner/Website owner.
Feel free to CASE (Copy And Share with Everyone) one of my cards for personal use ie: not for competitions, publication or where you would gain financially - but please make a couple of simple changes to make the card reflect your own input and personality eg: brads instead of buttons, different papers or border punch etc. and please include a link back here to my original card as a matter of kindness and courtesy. I have a watermark/web address on my cards to help you remember where it came from.
Feel free to share my cardmaking projects on Pinterest. If you hover over my photos with your mouse, a Pin It Button will appear and you can pin my project which will include the direct link. All of my photographs are copyright to me and may not be copied, shared or reproduced in any form without consent. Please play fair and don't harvest any of my images. Thank you for your understanding.


.jpg)


